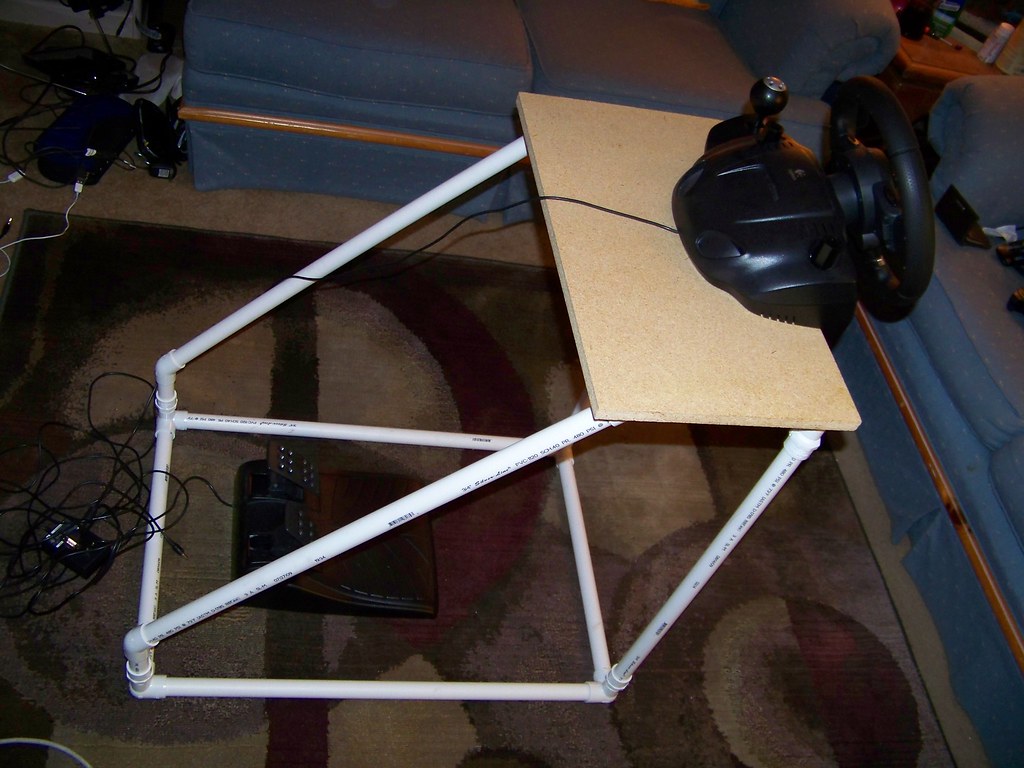
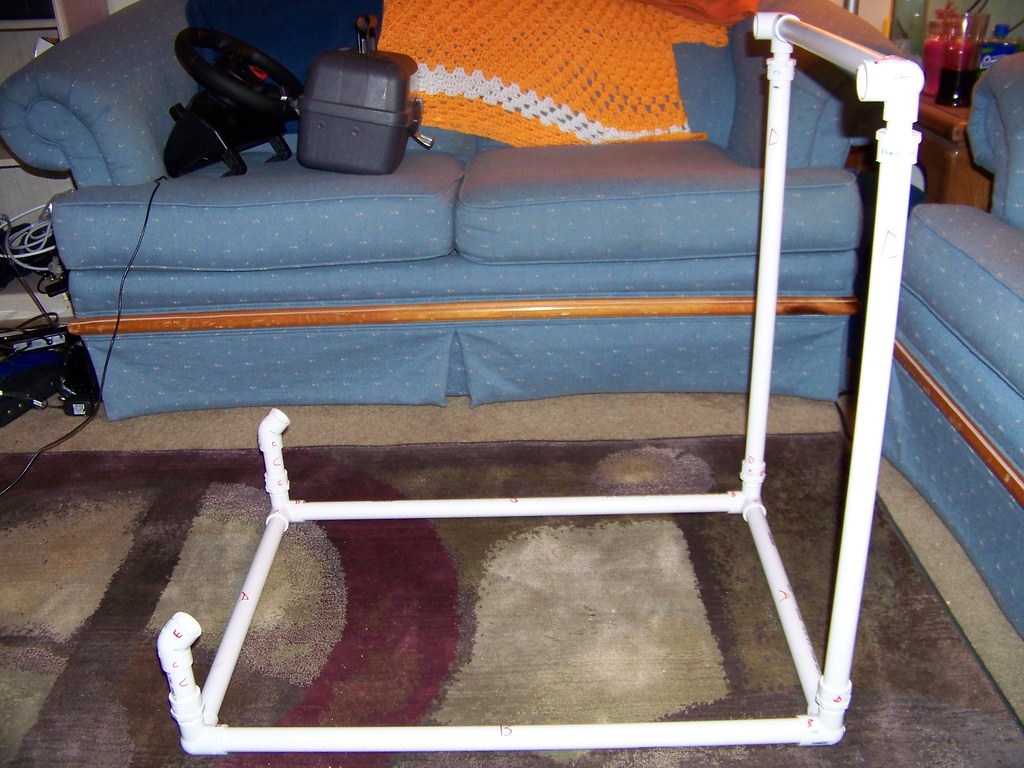
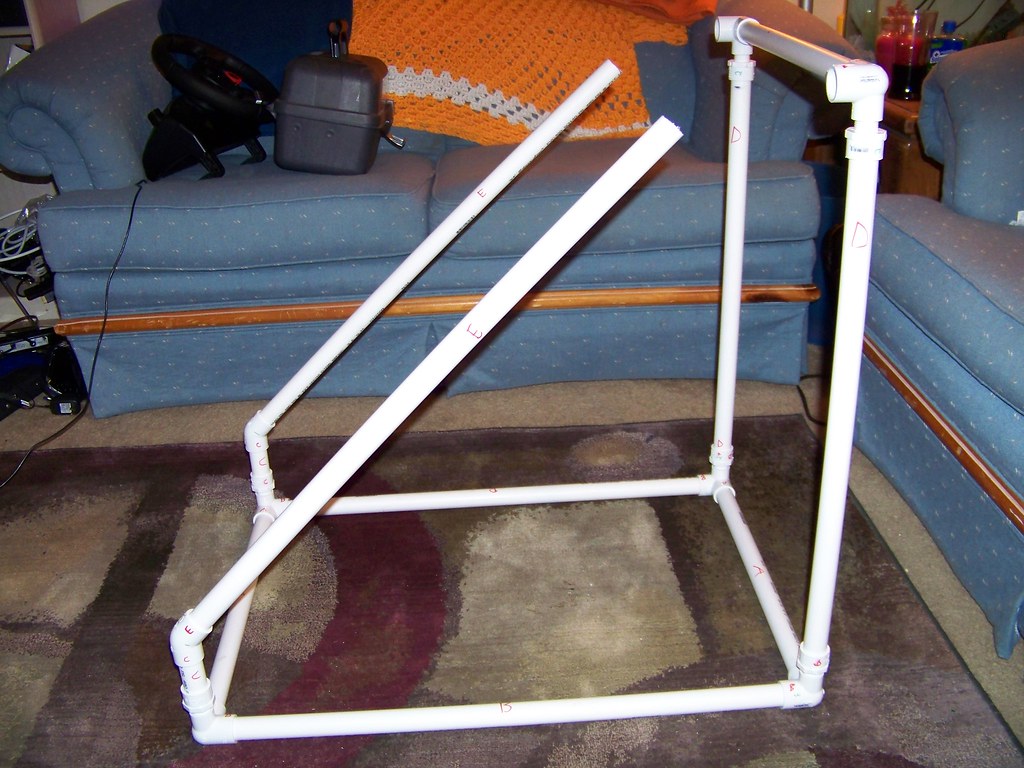
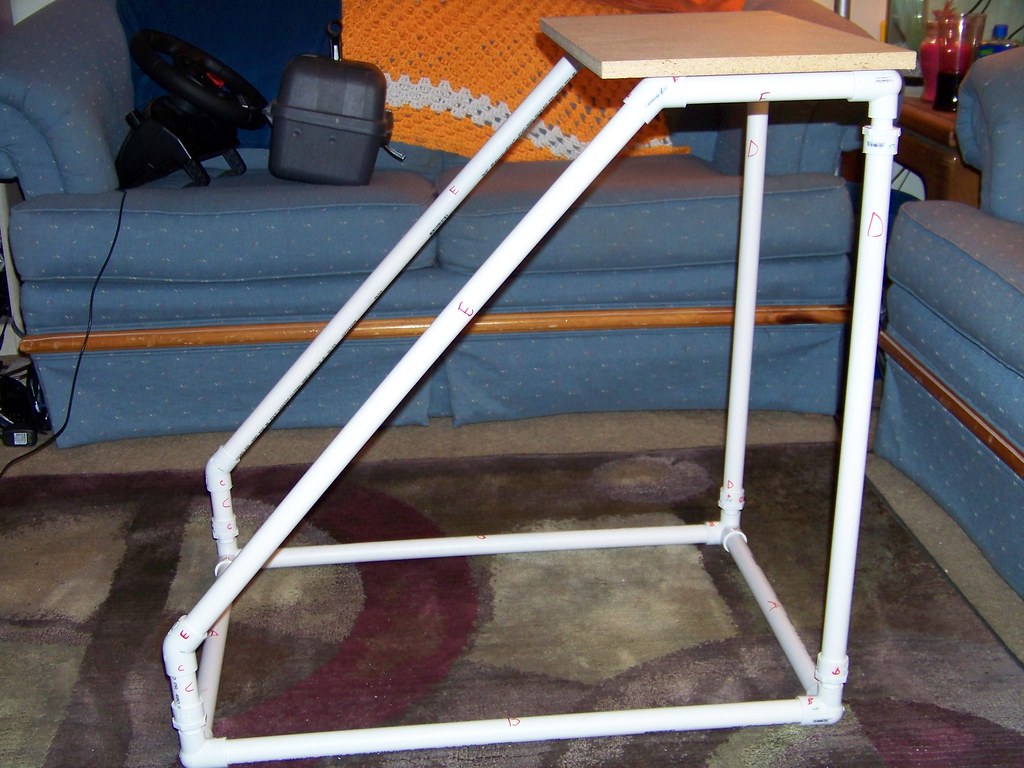
To celebrate the long awaited release of GT5, as well as the release of Need for Speed Hot Pursuit and other fine racing titles, I am posting detailed instructions on how to build a PVC racing rig for roughly $20 (provided you don't need to buy a handsaw like I did). Here's a picture of what we are going to build...
Here's a video of the rig in use
Before you proceed, please understand that I am 6 feet tall so the height of my rig is based off how comfortable I am with the wheel while sitting in a chair. If you are shorter or taller you may have to adjust your dimensions.
This is a VERY basic rig, and I know it's not the sexiest thing in the world but it most definitely gets the job done. You can drive the roughest rally tracks in Dirt 2 and not have to worry about the thing shaking like a T.V. tray or falling apart on you!
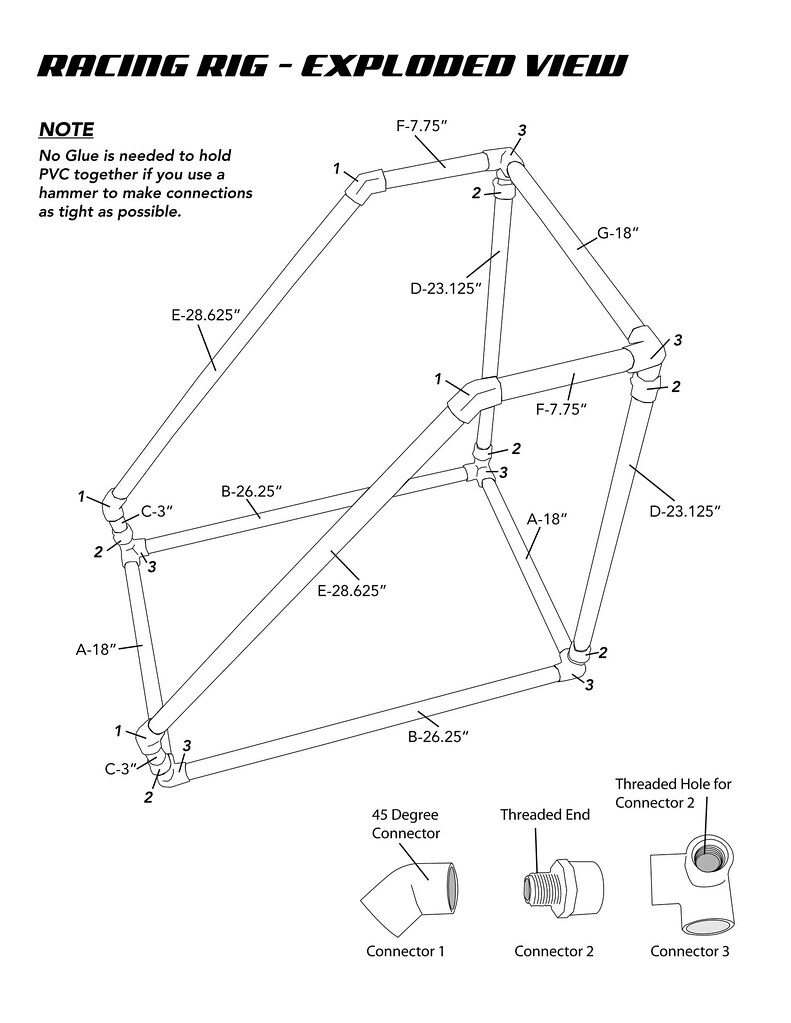
Also, I spent a lot of time making the exploded view below because it's going to help you A LOT when it comes to putting this thing together!
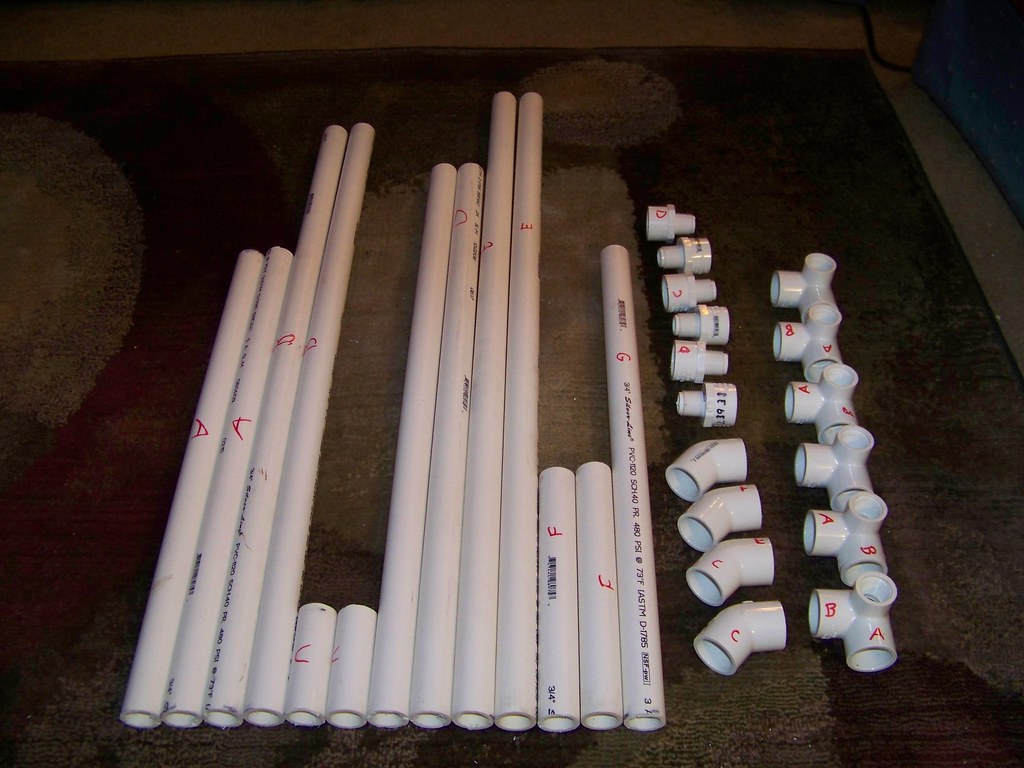
The first thing you will have to do is buy your PVC from your local hardware store. Luckily for you I have created a small shopping list with images so when I say you need something and I mess up the name you can just look at the picture and find the pieces you need real easy.
Ok, so without further delay, here are the PVC items you will need to purchase.
20 FEET of ONE INCH PVC pipe.
(If you cut everything perfectly it will use 19.29 feet of PVC pipe, you may want more than 20 feet.)
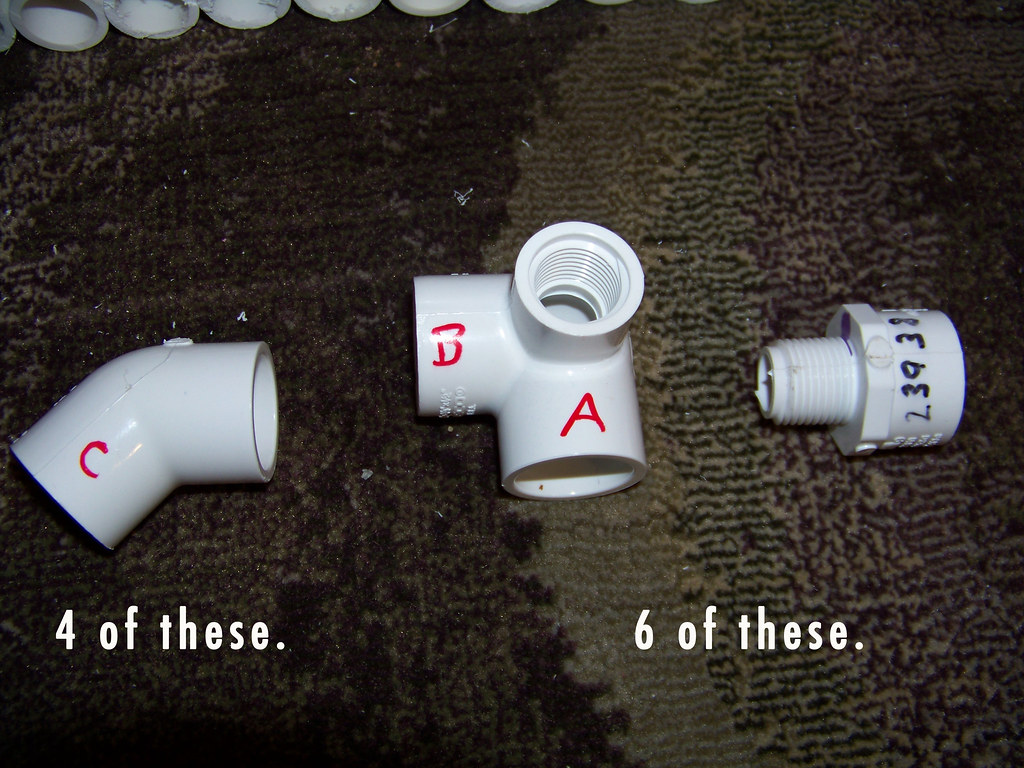
FOUR 45 degree couplers.
(this will be called Connector 1, all connectors will attach to the 1 inch PVC)
SIX 90 degree couplers WITH threaded hole on top.
(This will be called Connector 3)
SIX single end couplers WITH threads. (this will be called connector 2, all of these will thread into the threaded hole for all of the connector 3's)
Here's what these "connector" pieces look like..
One piece of wood or similar hard material that will be roughly 21.5" x 11.875" in size.
(I found a cheap piece of rigid particle board stuff, 2 for $4. This is what the steering wheel will sit on. Don't use soft materials like foam board, eventually it will wear out and the wheel will become loose over time.)
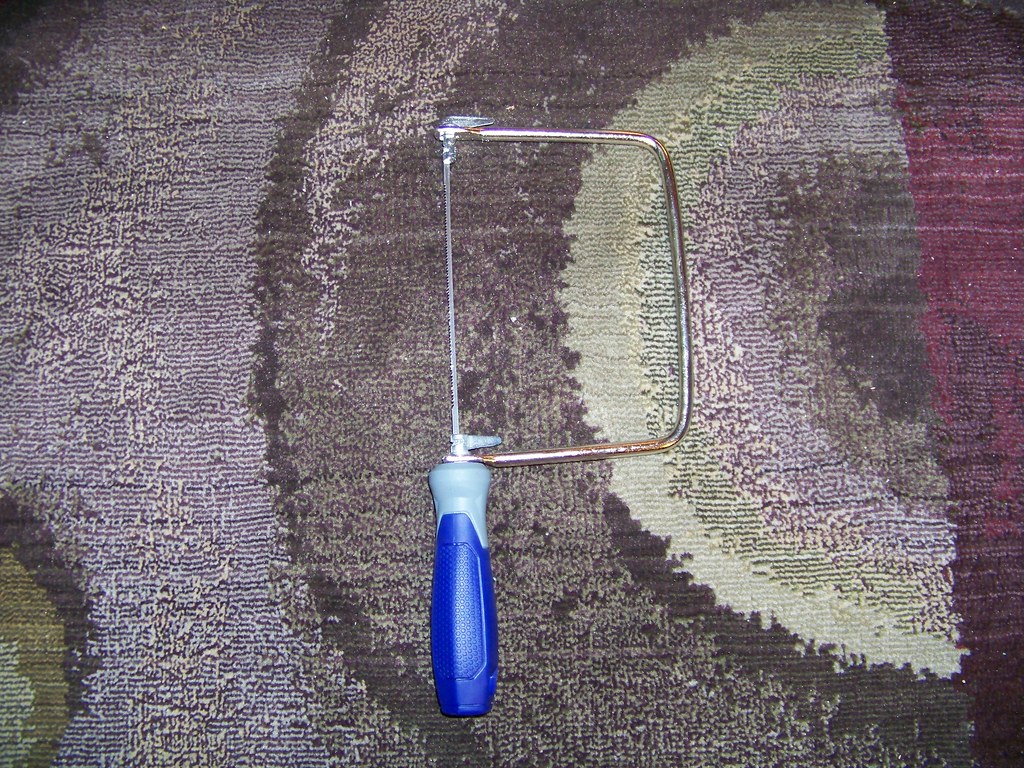
Hand-saw (You may already have this, but if you're a fresh college grad like me and you have no tools, oh, and you're too poor to buy a electric saw because you spent all your money on video games you definitely wanna pick one of these up!)
This one worked well for me...
TIME TO CUT SOME PVC!
Once you have arrived home from the hardware store it is time to start cutting up that PVC! As always be extremely careful cutting the PVC, if you are using a power tool to cut the PVC you may want to wear safety glasses. Now you may be wondering just how in the world are you going to cut this PVC so you have a nice rigid rig for that awesome steering wheel you just purchased. LUCKILY for you I have measured all of the pieces on my rig so you can use my dimensions.
I am going to list different pieces of PVC and organize them with letters, this will help me show you how to assemble the different pieces together. (Remember that exploded view up top? Now would be a nice time to pull it out.)
Make TWO 18 inch pieces and label them "A"
Make TWO 26.25 inch pieces and label them "B"
Make TWO 3 inch pieces and label them "C"
Make TWO 23.125 inch pieces and label them "D"
Make TWO 28.625 pieces and label them "E"
Make TWO 7.75 inch pieces and label them "F"
Make ONE 18 inch piece and label it "G"
After everything is cut you should have something like this....
TIME FOR ASSEMBLY!
Well the hardest part is done, that wasn't so bad right?! Now that you have all of your PVC cut it is finally time to start putting it together!
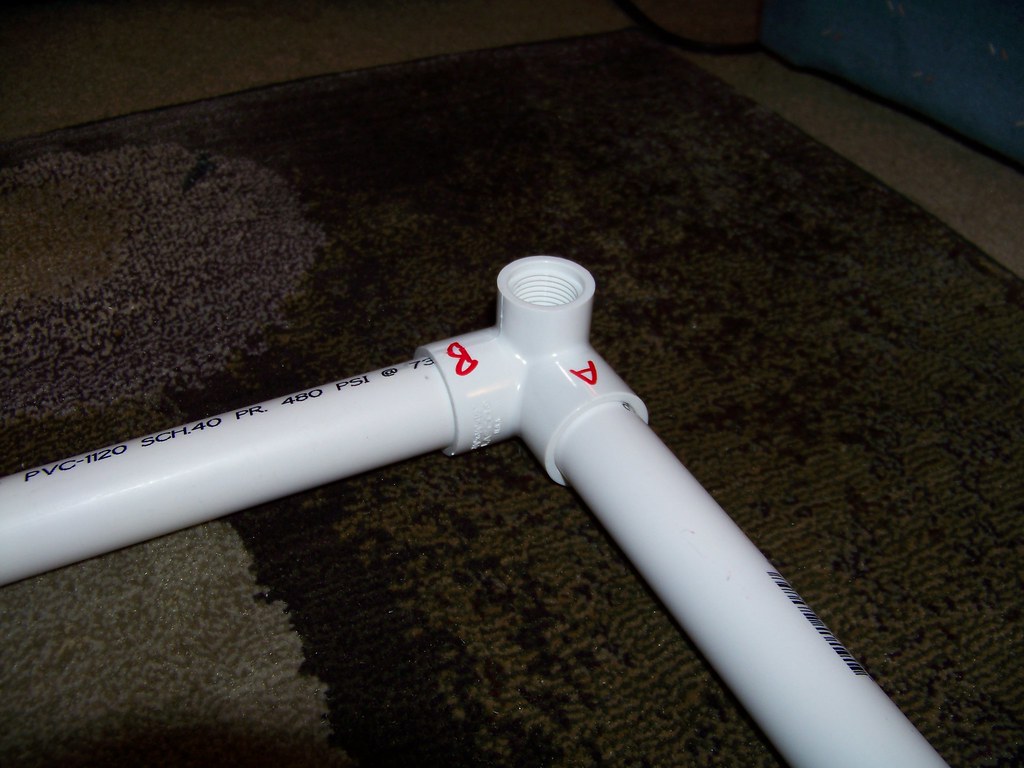
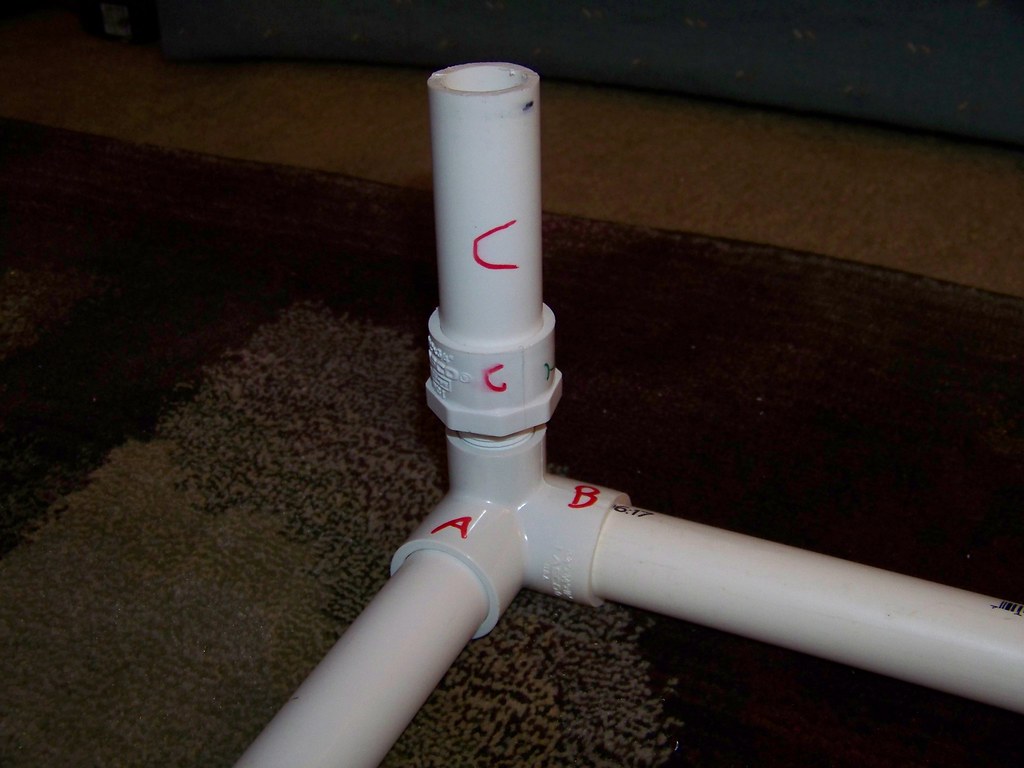
Grab the pieces marked "A" and the pieces marked "B" as well as FOUR "Connector 3" pieces. Take one of the "A" pieces, and then two "connector 3" pieces. Put one connector on one end of piece "A" and the other connector on the other end. Do this for the other "A" piece. Be sure the threaded hole on the connectors are facing the same direction. In other words, if that piece is on the floor have the threaded holes facing the ceiling.
Now you are going to take the "B" pieces and connect them with pieces you assembled above. You will be making a rectangle and when these pieces are placed together on the ground you should have something that looks like this....
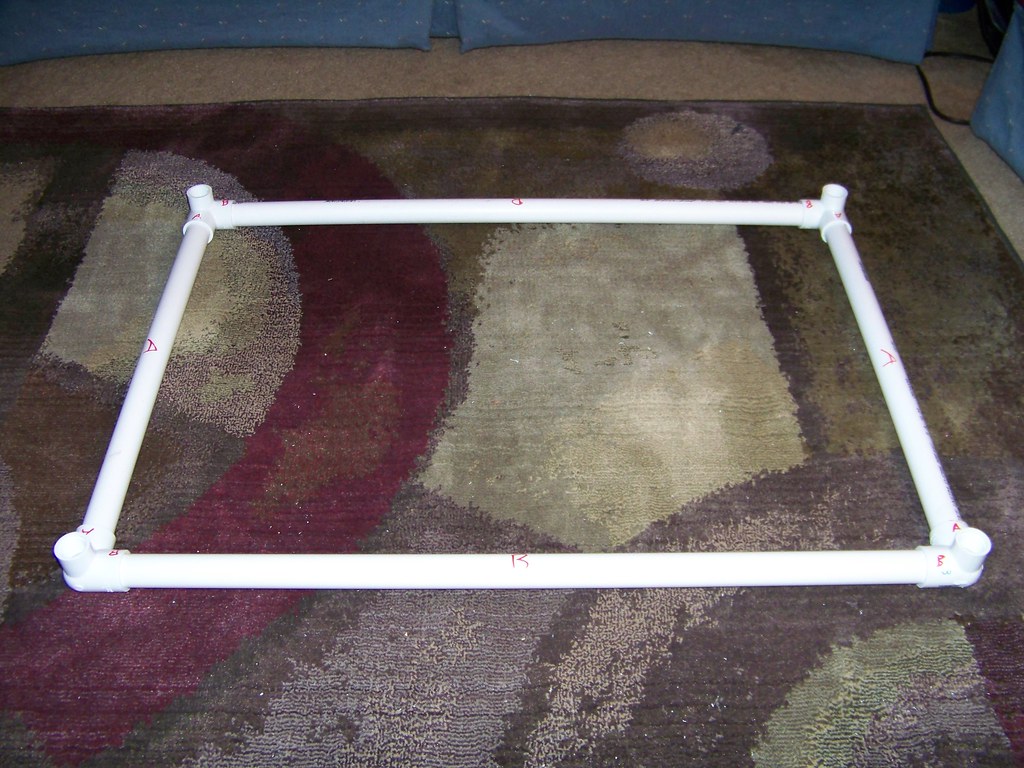
You should have the threaded holes of "connector 3" facing upwards.
Next, we are going to thread "connector 2" into those threaded holes on "connector 3" like so....

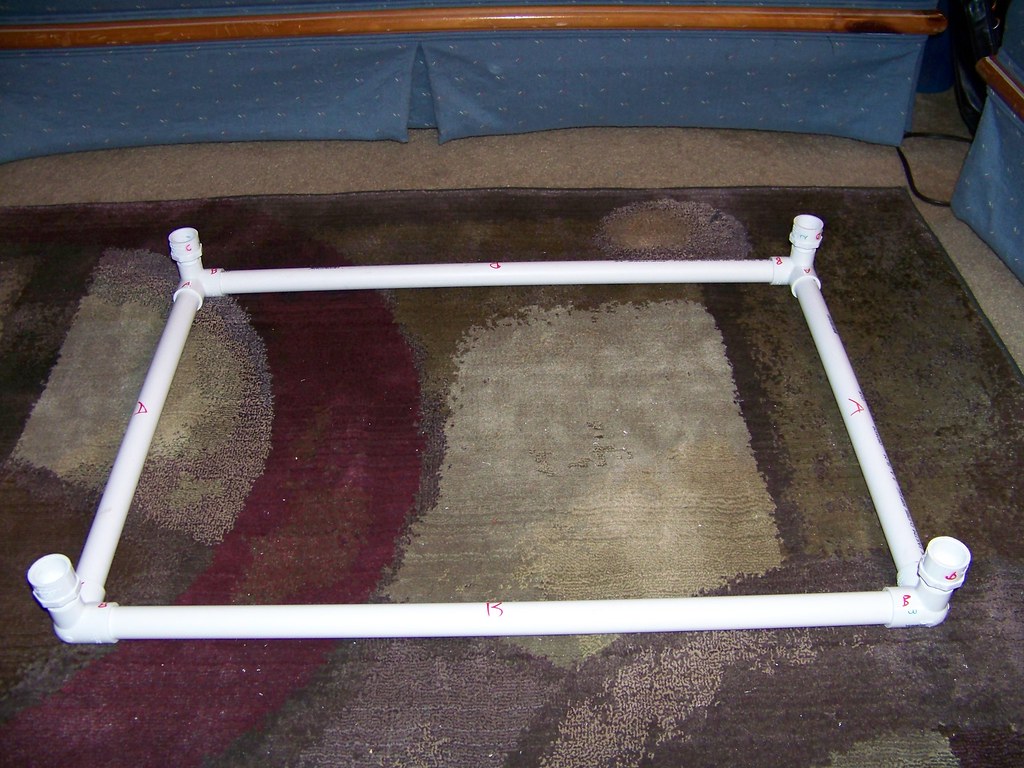
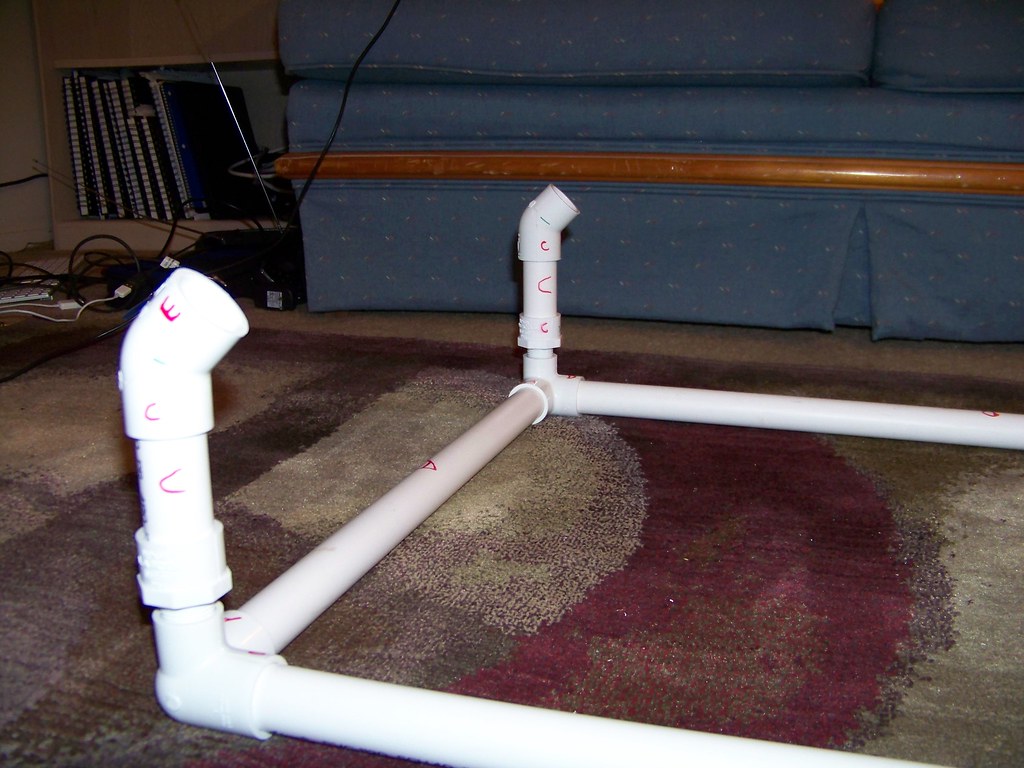
Now we are going to install both "C" pieces on the left (or front) of the rig. Take the "C" pieces and put them in the two "connector 2" pieces on the left. Like this....
so it looks like this...

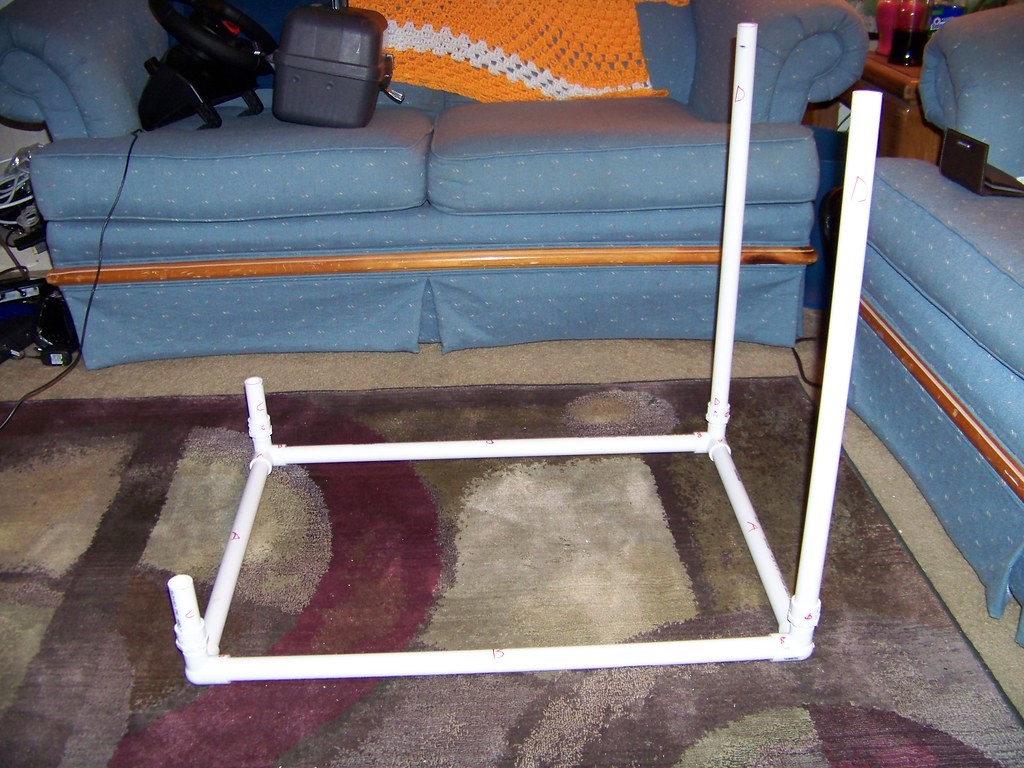
Next we are going to put in the "D" pieces. Slide the "D" pieces into the remaining "connector 2" pieces. The rig should now look like this...
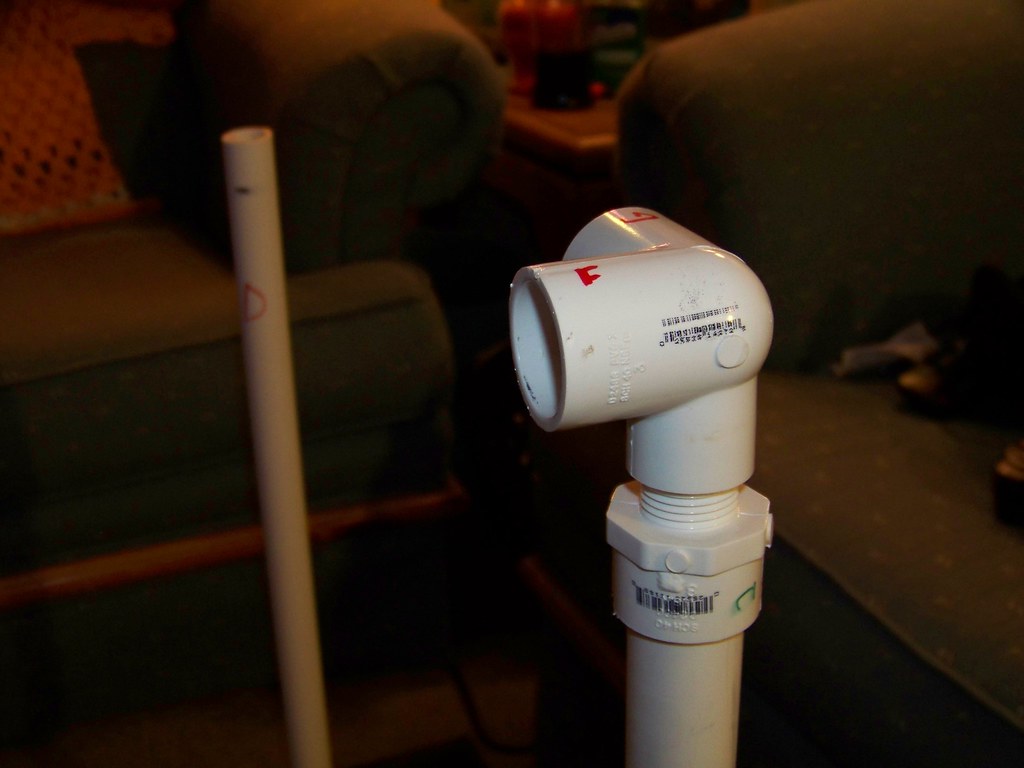
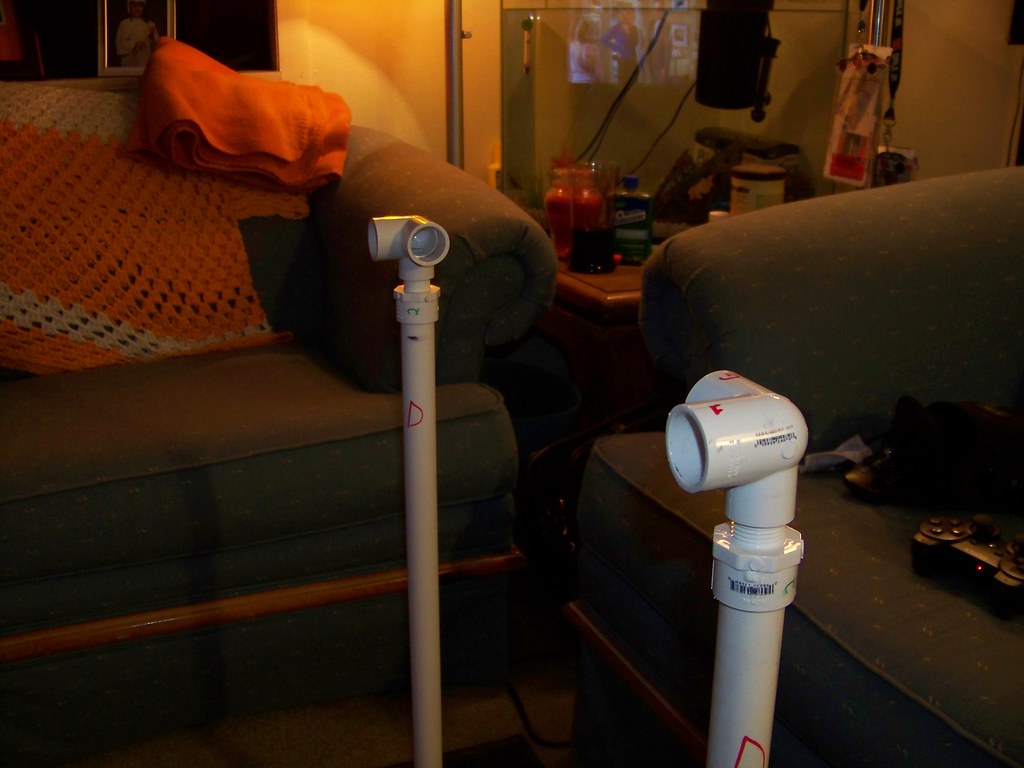
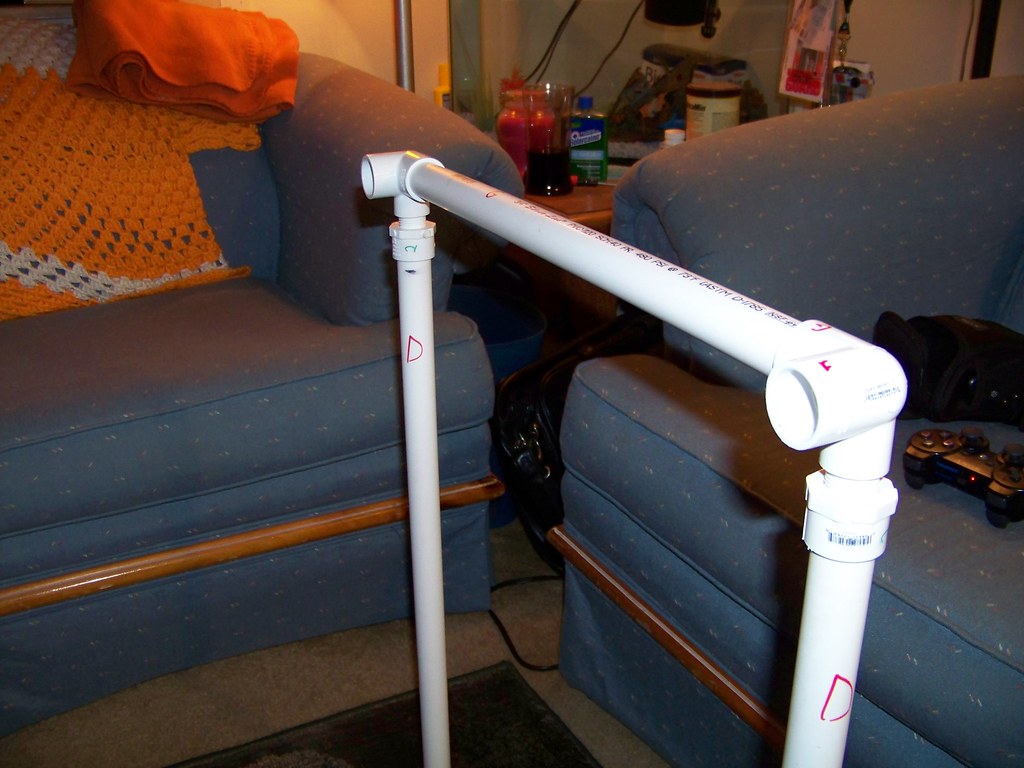
Now that you have the "D" pieces installed, we need to add our remaining "connector 2" and "connector 3" pieces on top of the "D" pieces. Thread the remaining "connector 2" pieces into the remaining "connector 3" pieces. Once you have done this install these connectors on top of the "D" pieces. Two of the open holes should be facing each other, the other two should be pointed at the "C" pieces. Here's a couple pictures to show you what I mean.
Now that you have those connectors installed, it's time to install piece "G". Here's a picture to help you find out where to put "G"...
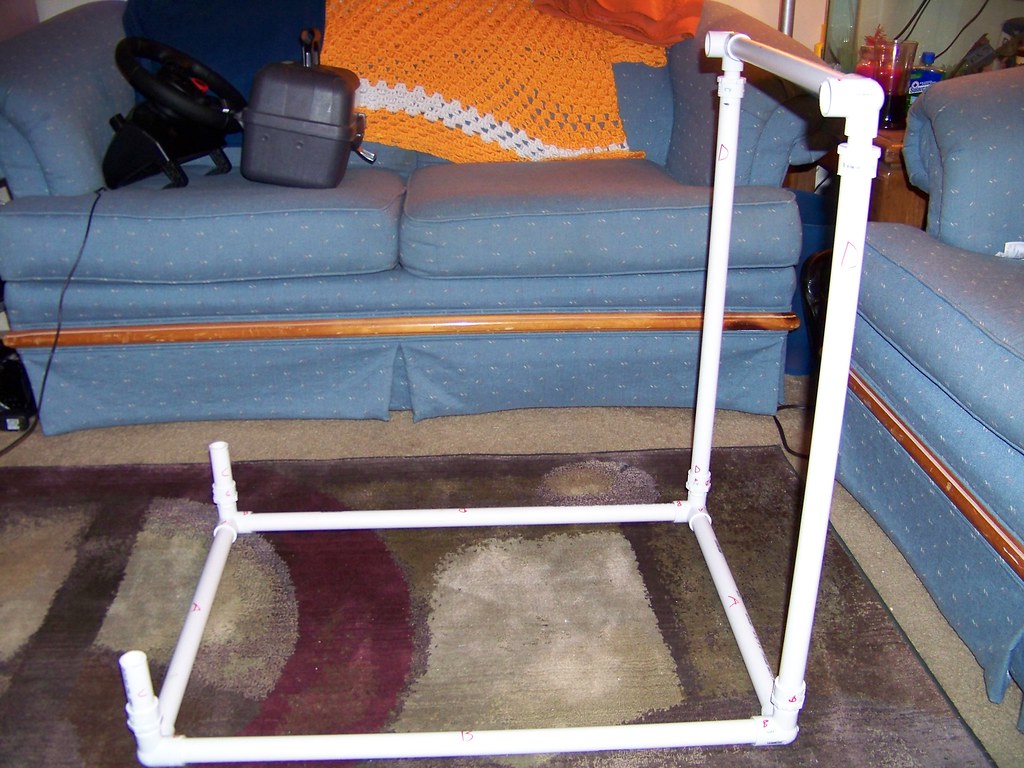
Now your rig should look like this....
For the next step we are now going to use those 45 degree pieces, called "connector 1". Take two "connector 1" pieces and slide them on top of the "C" pieces. Like this...
Now the rig is like this...
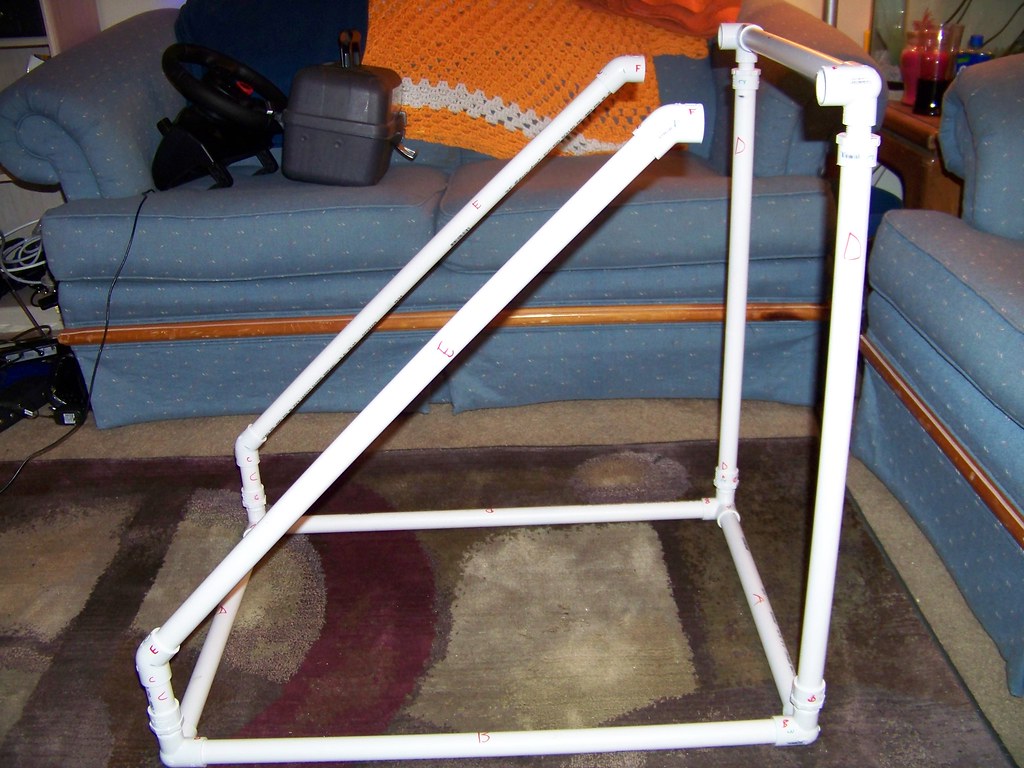
Now take the "E" pieces and slide them into the "connector 1" pieces you just put on piece "C". The rig will now look like this....
Take your remaining "connector 1" pieces and put them on the end of those new "E" pieces. Like this...
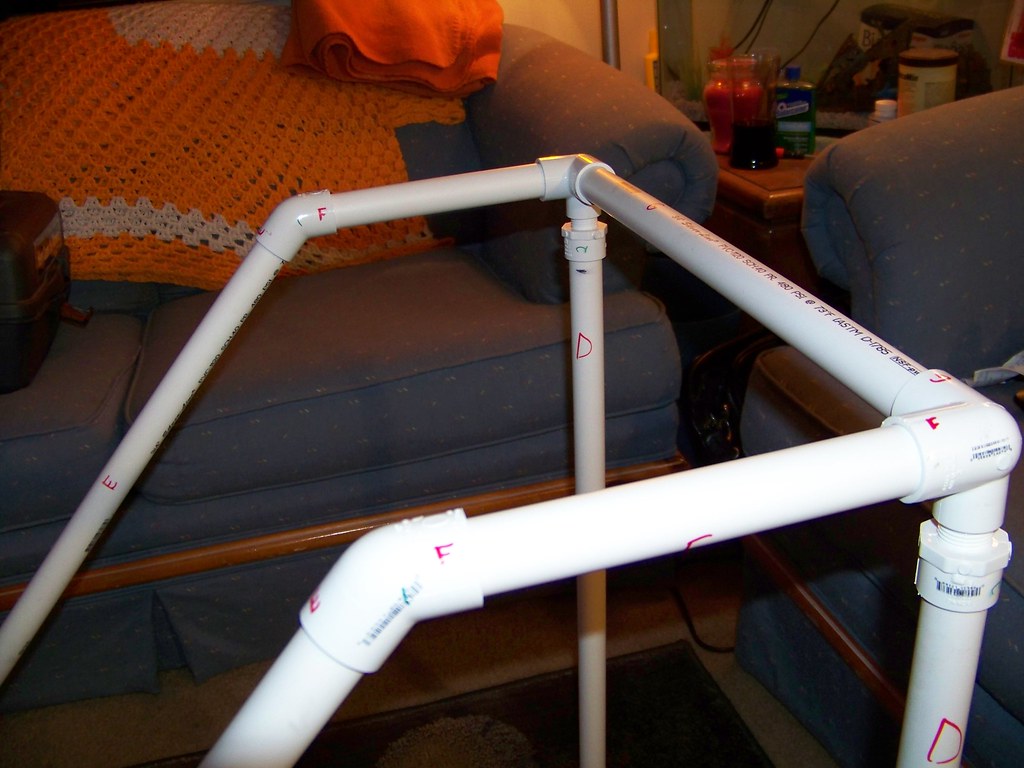
Almost done! Take the "F" pieces and put them in the end of the new "connector 1" pieces. Now take the other end of the "F" pieces and slide them into the open holes on both "connector 3" pieces. You may notice in the picture above that things aren't going to line up properly. Don't worry, it'll fit and everything will be nice and tight. Here's proof....
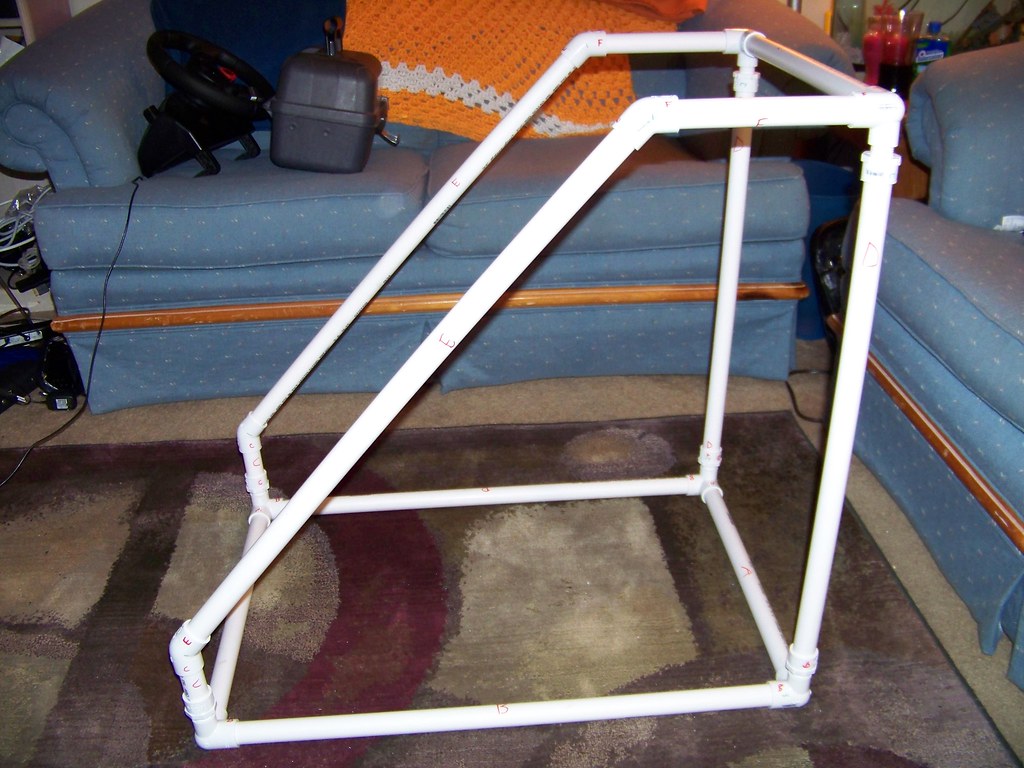
The rig will now look like this....
Before you continue, you may want to take a hammer and carefully hit the "connector" pieces to make sure everything is fitting nice and tight. You DON'T want your rig coming apart as you are fighting that steering wheel do you? If everything was cut correctly it should fit tight enough to where you don't need to use any glue or clamps to hold the rig together.
Now the last major thing to do is install the board that the steering wheel will sit on. You can use the clamps from your steering wheel (if yours has clamps, my Driving Force GT does!) to hold the board to the PVC pipe so essentially you don't need any tape or glue to hold this board down. Here's what mine looks like...

Now just install the steering wheel like this and....

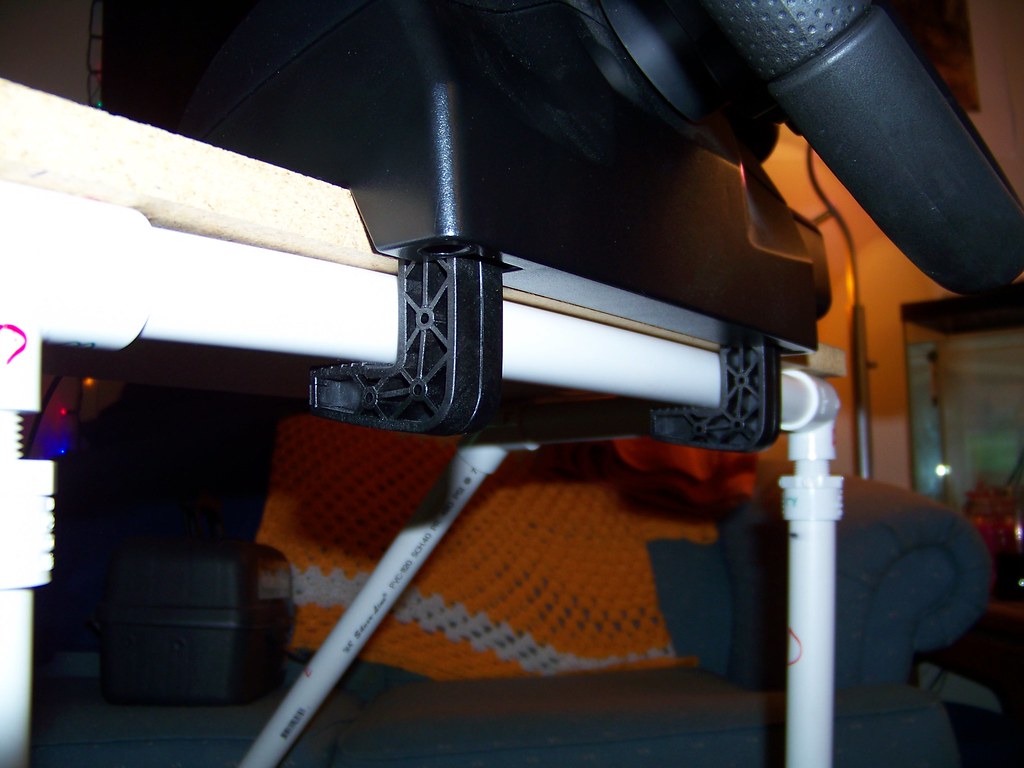
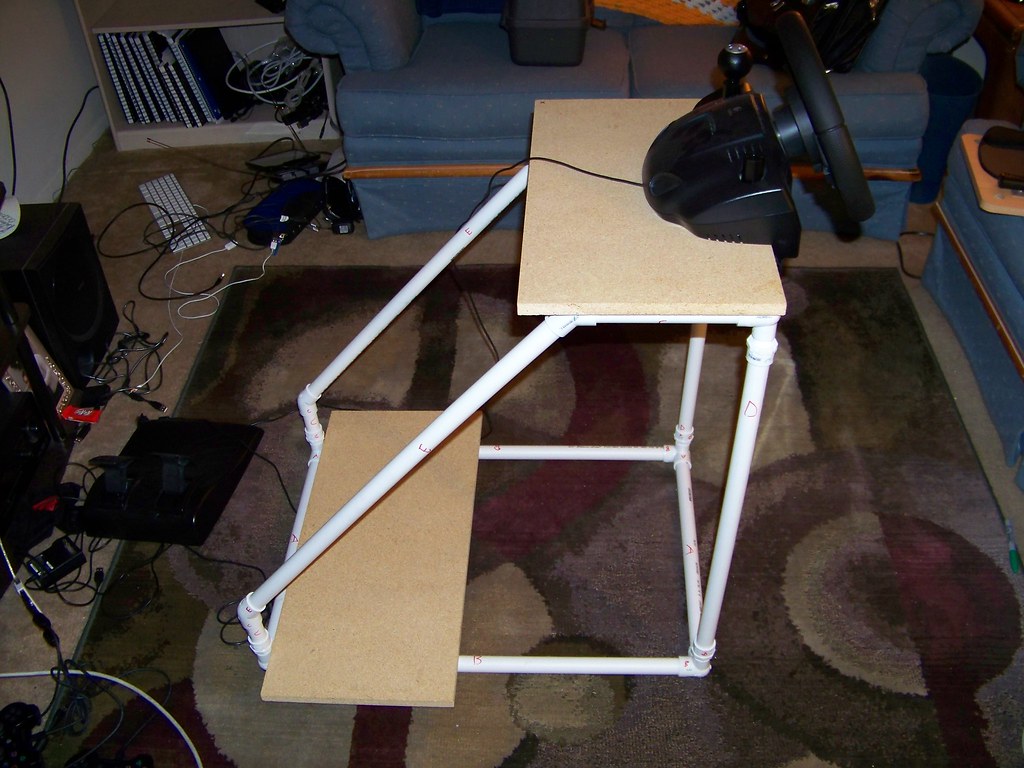
...try to make sure those clamps are touching as much of the PVC as possible. Now just tighten them as much as you can so the wheel stays in one place and holds that board down tight. Your rig should now look like this....

The last thing to do is lay a small board across both "B" pieces near the front of the rig so if you jerk on the wheel really hard the rig won't come off the ground.
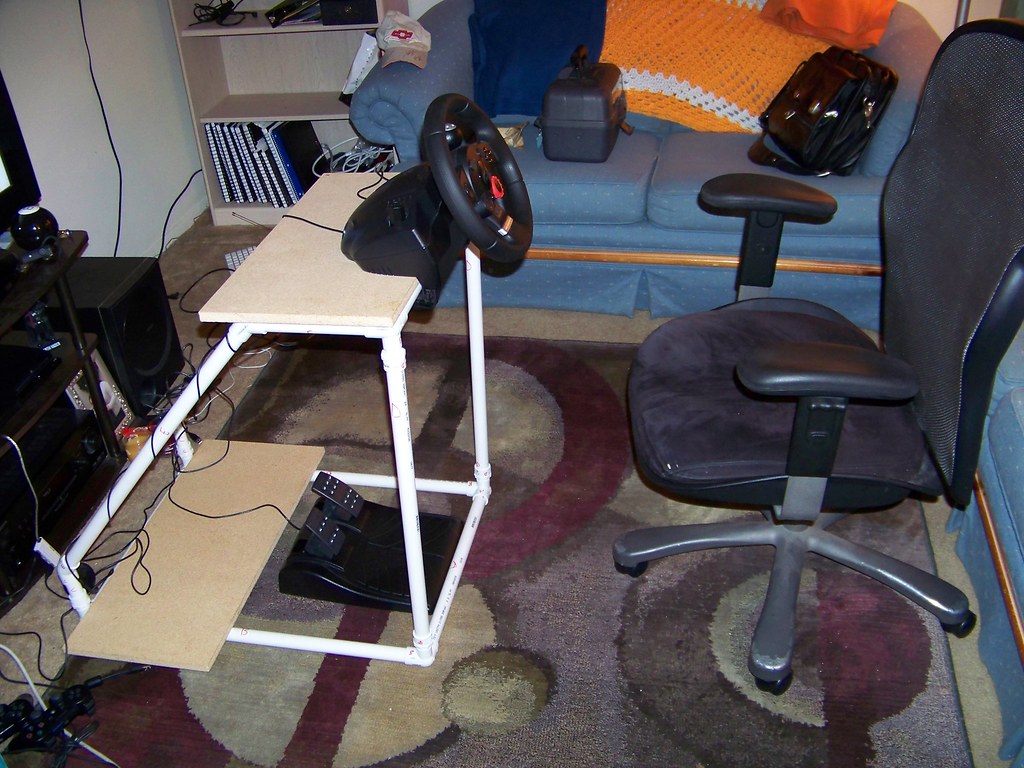
Now just get a comfy chair, put the pedals in place, and you're good to go!
Congratulations! I hope this build was fun and not too difficult. I spent many hours planning this out and it took a few tries getting the height right on the rig. Funny thing is it took just as long to write this blog as it did to build the rig the first time. You can obviously paint yours and add your own little touches but hopefully this will get you on your way to having fun with that new wheel and GT5, or any other awesome racing game.
I've played Dirt 2, F1 2010, and GT5: Prologue with this rig and it has done really well for me.
If you have any questions feel free to email me at kris.wysong@gmail.com
If you want to race me online, email me and I'll send you my user name!!